Vision Dataset Creation
Creating a new Dataset
Creating a new dataset in QpiAI Pro is simple and efficient, allowing you to quickly prepare your data for AI model training:
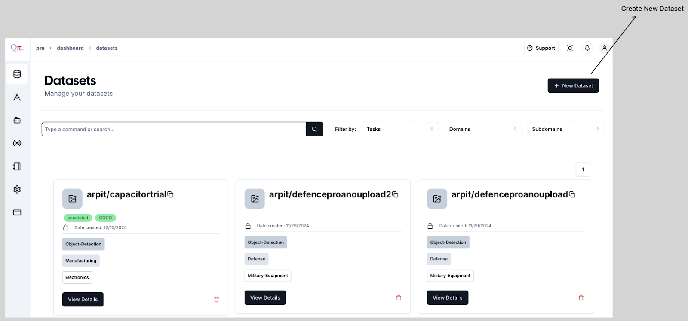
- Access the Data Section
- Navigate to the “Data” tab from the dashboard and click on the “+New Dataset” button located at the top right corner.
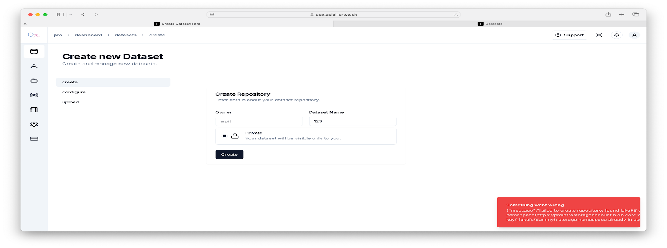
Once you click on the “+ New Dataset” button you will be redirected to the Create Data window. The dataset uploading in QpiAI Pro consists of the following steps:
- Create
- Configure
- Upload
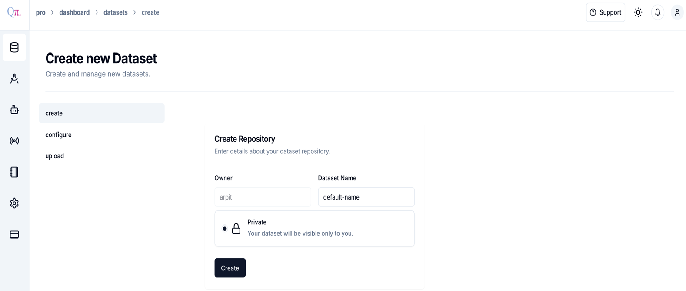
- Naming the Dataset
- Enter a unique name for the dataset (special characters are not allowed).
The owner of the dataset is the user from whose account the dataset has been created. This is followed by the dataset name. While naming the dataset make sure you do not give any special characters in the Dataset Name.
 .
.
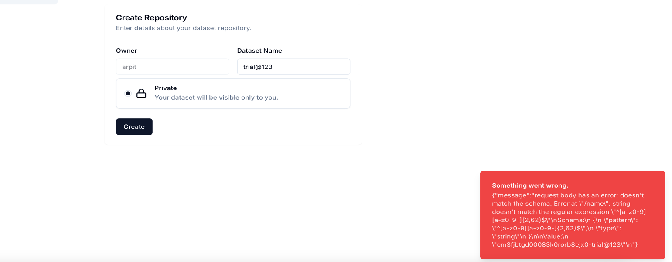
Dataset Naming Convention & Requirements
When creating or uploading datasets in QpiAI Pro, adhere to the following naming conventions:
- Use only alphanumeric characters (a–z, 0–9) and hyphens (-).
- All characters must be in lowercase
- Avoid special characters (e.g., @, #, !) and spaces.
- Example of a valid name: ‘dataset-name123’
If your dataset name does not comply with the established naming conventions, you will receive an error notification requesting you to modify the name according to the required schema. This validation ensures data consistency and system compatibility. Please review the naming requirements and adjust your dataset name appropriately before proceeding.
Error Messages
Failing to adhere to the naming convention will show the error message at the bottom right corner of the screen.
Failing to provide a unique name will show the following error message at the bottom right corner of the screen.
Upon successfully providing a valid name the user will be redirected to the next step which is “Configuring the metadata”