Model Training Step-by-Step Guide .
💡To simplify the selection process, filtering options are available based on Task, Domain, and Subdomain. These filters help you quickly identify the most suitable model for your specific requirements.
-
Now, will start model Training,
-
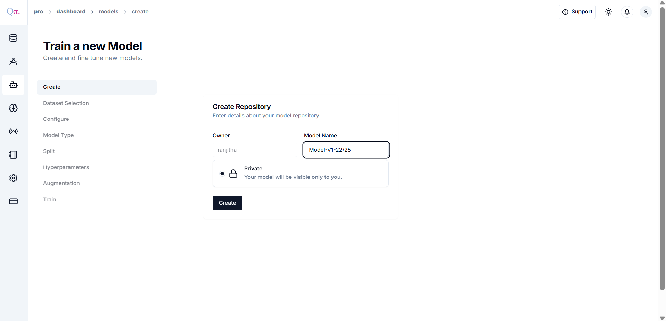
Click on “Train Model + ” , Create Repository with a default name and Click on “Create” .
-
Click on create, a pop-up message will confirm with “Success”.
-
-
Next, you will be directed to the Dataset Selection page. Choose a dataset from the list of those you have uploaded.
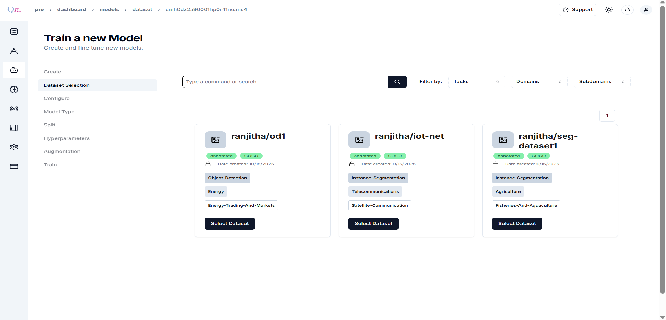
- Click “Continue” with the selected dataset. If you need to go back, click “Clear Section”, which will redirect you to the dataset card for
- further modifications.
-
Now, you will be directed to the “configure page”. Since the details were already updated during data creation, no additional information needs to be added. If there are any changes in Domain, Subdomain, Data Type, Tasks, or Description, you can make the necessary changes before clicking
- “Configure.” Upon successful configuration, a pop-up message will confirm with “Successfully Configured.”
-
The page for the “ Model Type” will appear. Choose Model and continue
- If you wish to choose a different model, “Clear the selection” else press “Continue” to proceed.
-
The page for “Split” will appear. Toggle the Split Configuration button , Choose the ratio you want ! Toggle Option on and off
-
You will now be redirected to “Hypeparam Page”.
-
Select your preferred technique, or use the default by enabling the toggle option. -> Next Click Continue!
on and off
-
-
You will now be redirected to the “Augmentation Page.”
-
Select your preferred technique, or use the default by enabling the toggle option. -> Next Click Continue!
on and off
-
-
Now you will land into the “Train”.
-
Click on the Train “Model” to begin the training process.
-
Model Training is initiated,
🟡 a blinking yellow, starting process.
🟢 a blinking green indicating the process is complete
-
After a brief moment, the Training Dashboard will open, displaying the ”View Experiment” section Select, This dashboard allows you to monitor real-time updates on the training progress and key metrics.
-
Tracking Experiments
Fine Tune Model Step-by-Step Guide.
💡Note : for Fine Tune Use Newly Added dataset
-
Now, will start model Training,
- Click on “Train Model + ” , Create Repository with a default name
- Click on create, a pop-up message will confirm with “Success” .
-
Next, you will be directed to the Dataset Selection page. Choose a dataset from the list of those you have uploaded Newly.
-
Now, you will be directed to the “configure page”. Since the details were already updated during data creation, no additional information needs to be added. If there are any changes in Domain, Subdomain, Data Type, Tasks, or Description, you can make the necessary changes before clicking.
-
“Configure.” Upon successful configuration, a pop-up message will confirm with “Successfully Configured. You will then be redirected to the Model page**.**
-
On this page, click on the “Trained” tab, where you’ll see the most recently trained model.
-
“Select” model, then proceed to click “Train” to begin the training process.
🔴 Failed — Indicates that the model training process has failed.
🟡 Aborted — Indicates that the model was not trained; the training process was interrupted or not completed.
🟢 Succeeded — Indicates that the model has been successfully trained.
-
Click on “Continue”.
-
“Skip” Hyperparam options
-
-
You will now be redirected to the “Augmentation Page.”
-
Select your preferred technique, or use the default by enabling the toggle option. -> Next Click Continue!
on and off
-
Click, save and Continue . a pop up will appear as successfully Augmentation settings have been set. -> Now the train model .
-
-
Model Training is initiated, After a brief moment, the Training Dashboard will open, displaying the ”View Experiment” section Select, This dashboard allows you to monitor real-time updates on the training progress and key metrics.
- 🔴 a blinking red indicates the process is Failed, You can choose to Re-try
-
Raising an Issue for support.
- Go To show in the right top corner
- Select Type > Issue Description > Submit.